

How to install Corvette LED interior lights for C5 or Z06
Description
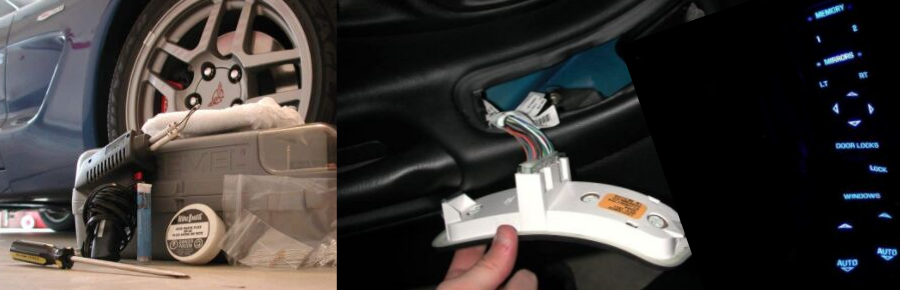
This is a brief explanation on how to install Corvette LED interior lights as done by Oznium customer, Carleton Yoder, on his 2003 Corvette Z06 using Oznium’s Super Bright Colored LED Lights. He chose to use blue LED bulbs for this project.
Details
The Corvette LED interior lights of the switch panels needed to be brighter and better.
For the driver’s and passenger’s switch panels, the customer decided blue lights would be more eye-catching than the original plain white.
The overall goal was to create a brighter glow on the door switch panels, and also to create a feature with his interior car lights.
Components
-
6 x blue Super Bright Colored LED Lights, with resistors (4 on driver’s side, 2 on passenger side)
-
Towel
-
Flathead screwdriver
-
Dremel With A Sanding/Cutting Attachment
-
Soldering gun
-
Solder
-
Acid paste flux
Instructions
-
For the first step, you’ll need your screwdriver and towel. Wrap the screwdriver in the towel to avoid damaging your side panel or door.
-
Remove the door’s switch panel using the wrapped up screwdriver’s edge, you’ll need to pry it up from the bottom of the panel where it’s held in place with a clip. Pry up the door’s switch panel from the top.
-
Gently squeeze on the plug attaching the panels to the doors, and remove the panel.
-
Using your screwdriver, remove the old LED bulbs from the back of the panels by unscrewing them.
-
Take your new colored LED light bulbs and pry out part of the wire at the back of the LED light and unwrap the light from its plastic holder. Remove the LED from the plastic holder.
-
Your new Corvette LED interior lights will need to be tailored slightly to fit perfectly. Using your Dremel with a sanding or cutting attachment, shave off a little from the sides and a good chunk off the top, ensuring not to cut too deep to avoid damaging the diode. This will naturally diffuse the light a bit which is fine.
-
To make the solder take better, put a little acid paste flux on the longer wire of your LED, heat up your soldering gun and put some solder on it, then attach the resistor to your LED’s positive wire (the longer one).
-
Wrap the LED wire and resistor wire back in the same way as the original LED bulb.
-
Push down the resistors on both ends of your door panel so they’ll be able to fit back into the door, and finally, plug your panels into the doors, your new Corvette LED interior lights are ready to go!
[NOTE] The LEDs have polarity, thus if you put them in the wrong way they will not light up. Make sure the LEDs are all lit up before putting the panel back in the door. If they are not, simply take them out, and screw them in the opposite way.*