
How to Make a Flounder Gigging LED Light
Project by
Ron Nakamoto
Description
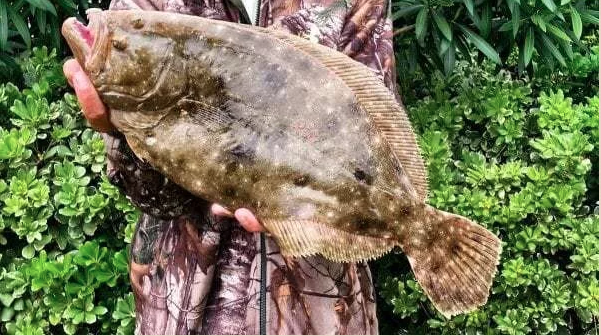
When it comes to flounder gigging, knowing how to build your own light can be what separates you from an epic catch of the day. By building your own light, it means that you not only have a choice between what color lights to use, but also the intensity of the brightness and the design of your mount.
For anyone wanting to make a flounder gigging light for their boat, this is a great explanation on how to make a LED flounder gigging light as done by Oznium customer, Ron Nakamoto, using Oznium’s Eclipse 12V LED Spot/Flood light as well as Ozniums Waterproof LED switch. There are many design ideas available to build your own gigging light, this one is great because it offers more comfort than most as well the convenience of a switch.
Details
Ron Nakamoto saw a need for a more efficient flounder gigging light after much trouble with other lights, after much research, trial and error, he was able to make his own.
This light includes an armrest for comfort and a green color LED as he finds it ideal (this is entirely up to you and the type of water you’ll be fishing, different color flounder gigging lights may work for different waters).
Theres the option of adding your own switch for your convenience, and also what youd need to do if you choose not to add your switch.
This is a summary of the detailed manual explaining how to make a LED flounder gigging light on slideshare.
Step-by-Step Instructions ‘PDF’
Components
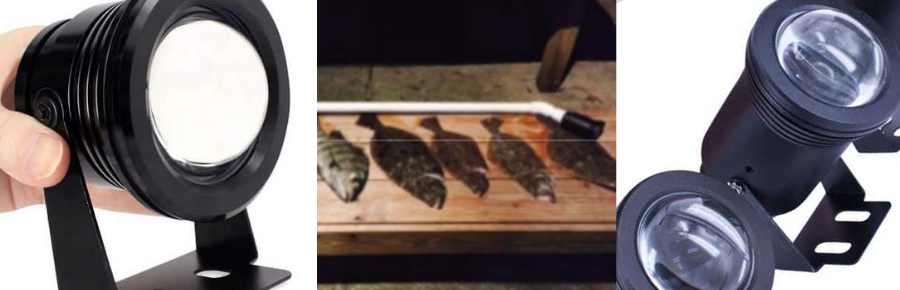
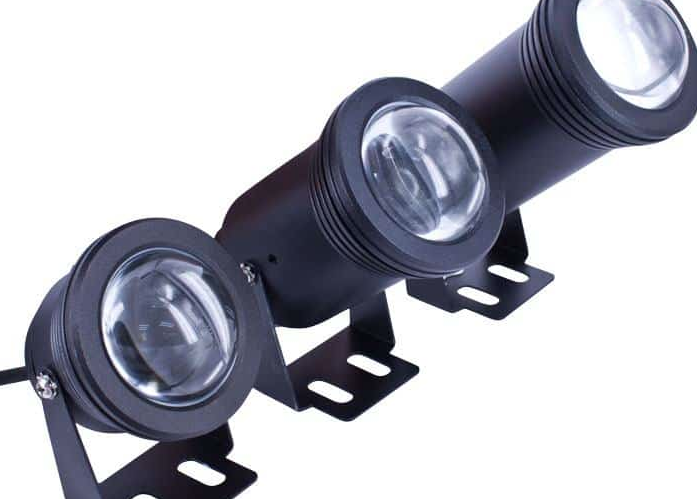
- 1 x Eclipse 12V LED Spot/Flood light, in green (20W and 50W is ideal)
- 1 x Waterproof LED switch, in green to match LED (Optional, you could also hook it up directly to the [battery](https://www.amazon.com/gp/search/ref=as_li_qf_sp_sr_tl?ie=UTF8&tag=zo2-20&keywords=12V 7AH battery&index=aps&camp=1789&creative=9325&linkCode=ur2&linkId=0ebc82eeed80a565bda2f6cd22bf19c2))
- 96" 16 to 22 gauge wire
- Butt splice connectors heat shrink insulated
- Heat shrink (large enough to cover the butt connectors)
- Plumbers tape
- Purple primer
- All purpose cement
- Marine clear silicone
- 5'8" of 1" PVC pipe (Cut to 3 foot, 2 foot, 6 inches, and 2 inches)
- 2 x 1" PVC caps
- 1 x 1" 90 Degree PVC tee
- 1 x 1" 45 Degree PVC elbow
- 1 x 1" Adapter (Threaded)
- 1 x 3-Foot coupling fitting
- 1 x [12V 7AH battery](https://www.amazon.com/gp/search/ref=as_li_qf_sp_sr_tl?ie=UTF8&tag=zo2-20&keywords=12V 7AH battery&index=aps&camp=1789&creative=9325&linkCode=ur2&linkId=0ebc82eeed80a565bda2f6cd22bf19c2)
Step-by-Step Instructions ‘PDF’
Instructions
-
The first step in making these flounder gigging LED lights is to remove the unwanted parts of your light. The Eclipse 12V LED comes with the spot light and mount installed. Remove the spot light and replace with the flood light fixture for a more dispersed light. It also comes with the mount attached, remove this as it won’t be needed.
-
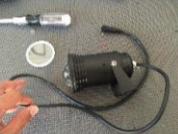
You’ll find an AC adapter attached to your Eclipse 12V LED Spot/Flood, cut this off and strip the wire. It won’t be needed in your flounder gigging light.
-
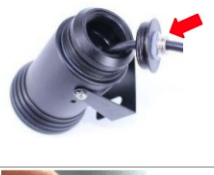
Prepare your light to fit into the 1" PVC threaded adapter by removing the back. Carefully unscrew it so you don’t rip the wire out from the back of the light or damage the black silicone waterproofing.
-
On the upper part of the back of the light, you’ll see a small silicone piece between the black wire and metal top. Cut two slits into it so it can be removed, then unscrew the top and it should slide off the wire.
-
Wrap Teflon plumbers tape around the thread of your PVC adapter and insert this part into your light.
-
You can choose to either fill up the space behind the light with silicone or you can choose not to, but it’s recommended that you leave it as is so you can easily unscrew the light if necessary.
-
It’s also recommended that you put some silicone in the screw holes to fill those up.
-
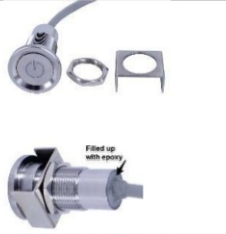
If you’ve chosen to use a switch, you’ll need to prepare a PVC cap, secure it and drill a 3/4" hole with your 3/4" bit or step drill. Your switch should fit perfectly, if not, go ahead and cut the hole open a little wider. Oznium’s IP68 LED push button switch comes with a nut which will need to be removed so you can insert the switch into the hole of the PVC cap. Be extra careful when working with the switch because of the epoxy filling in the back. Try not to bend or pull the wire causing the epoxy to crack.
-
If you’ve opted against using the switch (this is recommended as saltwater can get inside the wires), then you’ll need to remember to keep your 50W light submerged 95% of the time, and to disconnect it when not in use.This will ensure that your light stays in good working order for longer.
-
Before inserting your switch, place a thin layer of silicone around the outer circle of the cap, then insert your light and fill up the back of the switch with silicone. Doing this prevents water from getting into your switch. Place the mount in and then the nut that was previously removed, screw in the nut as far as possible and use the needle nose pliers to tighten it.
-
The wires are already stripped but will need to be stripped a little more so you can connect to the butt connectors and wrap them with the necessary wires.
-
You should be able to find 10 foot length of PVC pipe at most stores for about $3, so you can take this length of PVC pipe and using your saw or PVC cutter, cut into 4 parts measuring:
-
2 Inches - To be inserted in the 45 degree angle and PVC adapter
-
2 Foot - The top half of the light
-
3 Foot - The bottom half of the light
-
6 Inches - The handle of the light
-
Next you’ll get started on the armrest, if your arm is small enough you can use either a 3 inch or 4 inch coupling so that you have more support. If not, cut the coupling in half and sand down any protruding bits for extra comfort.The easiest way to find the correct placement for your armrest is to put your flounder gigging light flat on a table, position the armrest to where you’d want it and mark with a pen.
-
Use a pen to mark 2 holes for rivets in the center and drill holes with a 3/16" drill bit. Match your holes up with the mark you made on the pipe and mark the holes for your pipe, drill the holes with the 3/16" drill bit.
-
Place your rivets into the armrest and press them right through to the PVC pipe, test that everything matches up perfectly first. Put silicone on the ends of your rivets before inserting and also seal the holes with the silicone. Secure the rivets with the rivet gun, wipe off the excess silicone and allow to dry.
-
Protect your surfaces by putting down a protective cloth before working with purple primer. Wipe the purple primer onto the areas of your PVC that you’ll be connecting, ensure that you cover the inside of the connectors, cap and end of pipes and allow to dry (about 20-30 seconds).
-
Note that the cement dries really quickly so you set the cement properly when you connect the parts. Also ensure that you spread it around really well on all the parts that need to be connected so that it seals well. Using your 2" PVC pipe, place cement on the inside of your adapter and then around one end of the 2" PVC pipe.
-
Connect your 45 degree elbow to the other half of the 2" PVC pipe.Remember, it’s very important that your armrest faces the right direction, so test this out first before committing to the cement because it seals quite rapidly. As long as the handle faces up in the same direction as the light, you should be fine!

-
If you’re using a 20 watt light WITH a switch, you’ll need to add 8 inches of wire so it can reach through the PVC tee and connect with the other wires. Use the butt connectors, sealing them your heat gun or lighter. For extra protection, it’s recommended that you use additional heat shrink over the whole splice.
-
If you’re using a 20 watt light WITHOUT a switch, you’ll need to connect the extra wires using the same method used above. This way is highly recommended as you can avoid possible issues due to lots of splices and connections.
-
If you’re using a 50 watt light WITH a switch, the light has enough wire attached so run them through the pipe, you’ll need to connect them before sealing the rest of the PVC pipes, this is just to ensure that your switch and light work perfectly first.
-
Put the 3 foot PVC pipe into the 45 degree PVC elbow and your LED flounder gigging light is ready to go!
Project by Ron Nakamoto
Step-by-Step Instructions ‘PDF’