With LED lights for virtually any use you can imagine, you’ll have many options to choose from when picking the right motorcycle LED lights. Once you’ve picked the right LEDs for your motorcycle, trike, bike or scooter, you can wire them up!
Before we get into that, let’s take a look at some of the motorcycle LED lights available and their different uses.
| Oznium Products | Installation Types | Perfect For |
| LED Modules | 3M adhesive tape | Turn signal light Tail / brake light |
| Side view LED Bolt | Screw-in flush mount | License plate light |
| High intensity LED Flood Light | 3M adhesive tape Screw-in surface mount | Turn signal light Tail / brake light Underbody light |
| Flexible LED Strips | 3M adhesive tape | Wheels wells light |
| Prewired Surface Mount LED | 3M adhesive tape | Turn signal light Tail / brake light Dashboard light |
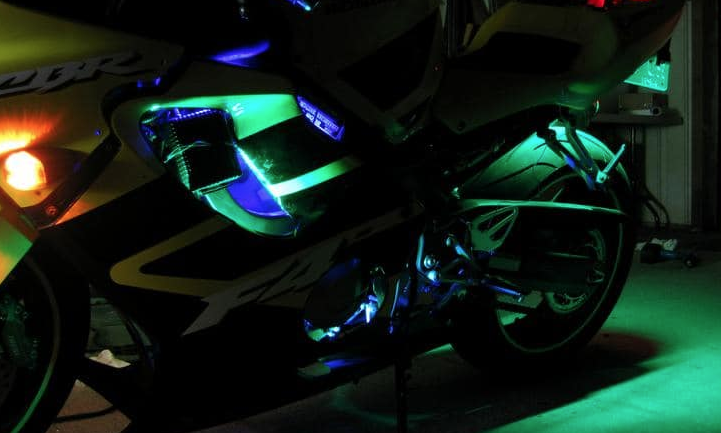
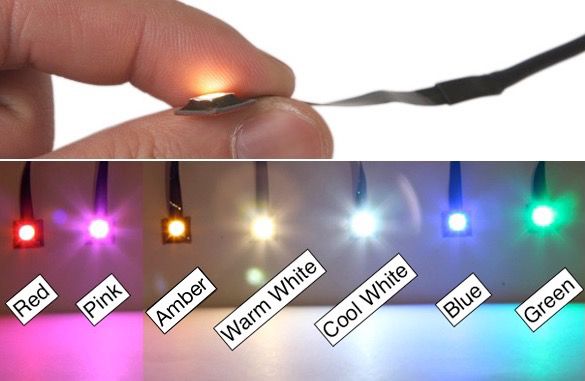
Bright LED pods & modules
LED pods & modules a versatile solution, available in a variety of colors, so they have a wide range of uses. Select the red option, and use them as auxiliary motorcycle led brake lights, pick them in amber, and you’ve got yourself an extremely bright and reliable turn signal light!
Side view LED Bolt
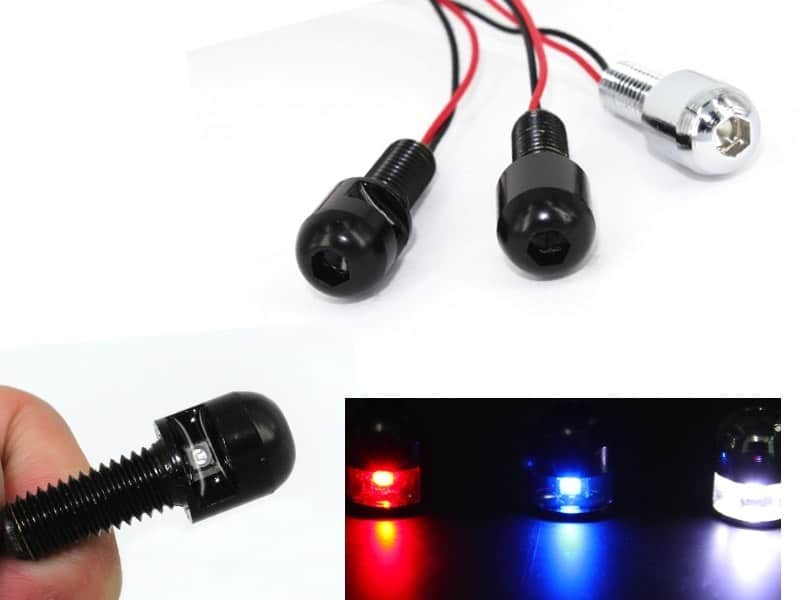
Consider using a side view LED bolt, their structure makes them the perfect lighting for license plates. Even though they’ll be exposed, these tiny LEDs are fully waterproof and impact resistant means that they’ll be able to withstand the changing weather conditions and environments.
LED Flood light
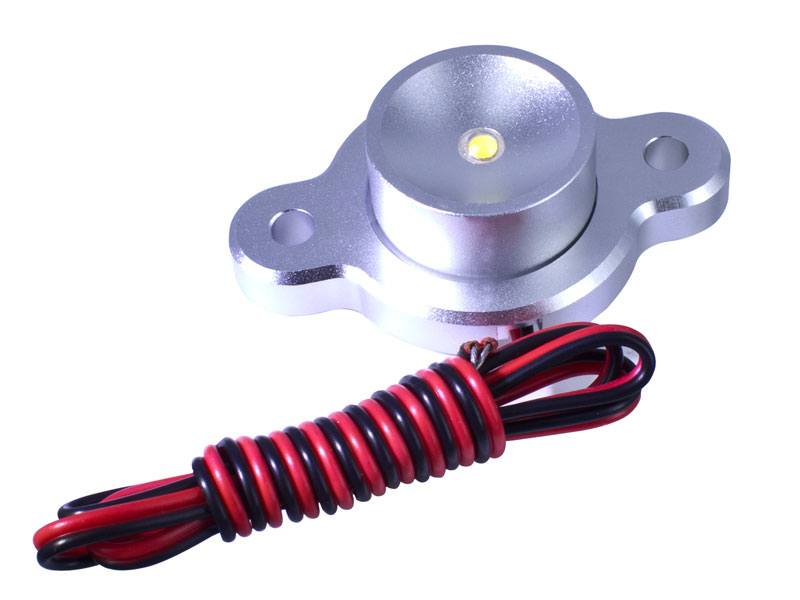
A super bright motorcycle LED flood light is an effective and inexpensive solution to many of your motorcycle LED lighting needs. Use them in your wheel wells, saddlebag or even underneath your bike. There’s a selection of colors so they make the perfect accent lights for your motorcycle, trike, or moped.
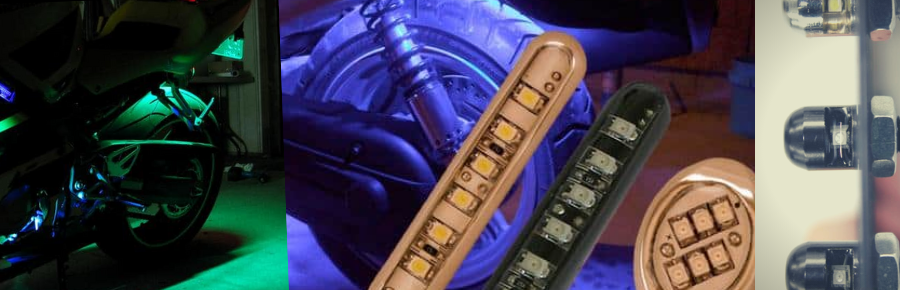
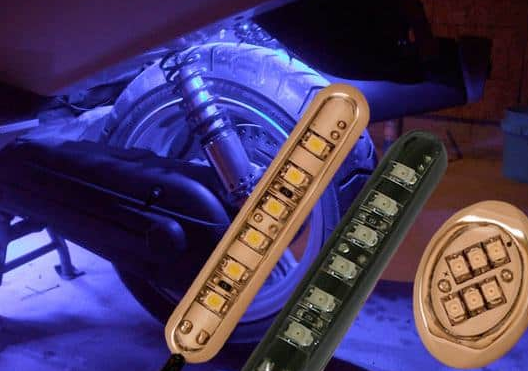
Flexible LED strips
As with all LEDs you decide to put on your ride, LED strips for motorcycles need to be absolutely waterproof. Once you’ve got that covered, you can have some fun and add your flexible LED strips to your wheels, and just about anywhere else you can imagine.
Prewired Surface Mount LED
Attached to an absolutely tiny, custom designed flexible circuit board, surface mount motorcycle LED modules are the best possible solution for your motorcycle LED tail lights. They’re available in red (amongst many other colors) so this style of LED is useful as motorcycle LED brake and tail lights. They come pre-wired, with a built-in resistor, so it really couldn’t be easier!
Here are 7 tips when you wiring motorcycle LED tail lights:
1. Keep it tidy
Before getting started on installing your motorcycle LED lights, prep your work area so you can keep things as tidy as possible. This is a good place to start your project because it might just save you from crumbling into a heap later on. Keep it tidy so you’ll easily be able to pick up wherever you left off and find parts without any hassle.
2. Follow manufacturer guidelines
Wiring new custom motorcycle LED brake and tail lights is not much harder than any other LED project because you’ll simply need to match up your wires correctly. Let’s say you’ve chosen to use the surface mount motorcycle LED modules for tail lights. These could simply be mounted with the 3M adhesive backing so it makes the entire job so much easier!
Remember to always follow the manufacturer’s instructions, particularly any instructions involving the mounting point. Consider using relays if you find yourself needing more insulation to counter the effects of vibrations.
3. Keep relays enclosed
If you’ve chosen to use relays, you’ll want to keep them dry and secure. Even though they’re usually pretty weather resistant, be safe and try mounting them somewhere well-enclosed. Try the headlight shell, under the gas tank or maybe even under the seat.
4. Protect terminal connections
It’s important to protect your terminal connectors, and dielectric silicone grease is great for just that. You can do this with any other switch you add, make sure they’re securely mounted and not exposed to the elements.
5. Don’t forget the fuse
The purpose of a fuse is to blow if the electrical load exceeds its limit, so it’s a good idea to always replace a blown fuse with a fuse that has the same rating. Using a fuse when adding electrical accessories is very necessary, make sure that it’s positioned close to the circuit and power source.
6. Prevent shorts from happening
You’ll want to disconnect the battery before doing anything on the electrical circuit. to prevent sparking which may occur if a hot circuit is accidentally ground. Make use of a wiring diagram to identify circuits, this will help a lot when wiring.
7. Be aware of electrical system load
When adding any extra LEDs to your motorcycle, you’ll experience a greater load on the electrical system, and you might even find that the load is too much. You’ll need to be certain of what your motorcycle can handle, and pick motorcycle LED brake and tail lights accordingly.
Phone: 800-245-8131 Weekdays 9am to 5pm